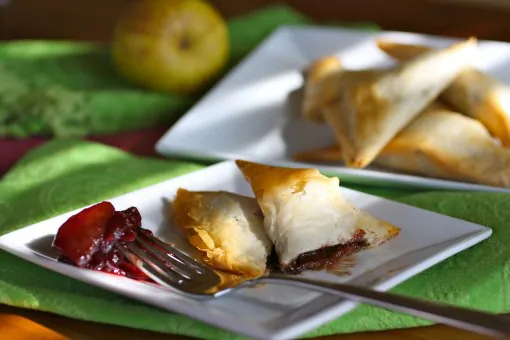
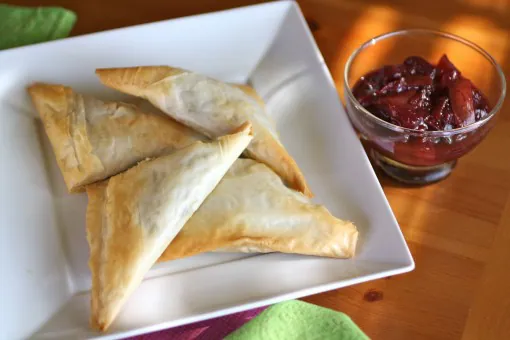
I swapped the veggies for chocolate
This week I was set to prepare and post a healthy recipe made with spring-fresh veggies. That is until I jumped on Facebook and started to click through my friend’s photos from her recent trip to London. The gardens looked gorgeous and the museum shots were intriguing, but what caught my eye was one of the out-and-about food shots.
It looked like my friend was enjoying Indian food – a favorite of mine. I saw Samosas in the frame, tucked behind a few cocktails, and as my mouth watered over those stuffed packets of golden dough, I read the caption. It said “chocolate Samosas.”
Indian inspiration
I showed the picture to my husband and told him that I wanted to make chocolate Samosas! We chatted a few minutes about how it could be done, and then he came up with the idea to add chutney to the recipe. At first I wasn’t interested in his contribution (I’m fine with just vanilla ice cream, thankyouverymuch), but he suggested “chutney” not chutney. Just as these would be “Samosas” not Samosas. Follow?
I don’t want to pretend that these Samosas and chutney are even close to traditional Indian delights, but we thought we would use the Indian food we love as inspiration. The Samosas are made from phyllo dough and baked, and the chutney is a combination of fruits, juices and seasonings. If you’d like, you can add nuts between the layers of dough or change up the fruit for the chutney.
This is an easy dessert to put together and is best served warm. I suggest including vanilla ice cream in your plans.
Chocolate Samosas with Pear-Cherry Chutney:
Yields 12 Samosas and approximately 1-1/2 cups of chutney
INGREDIENTS
For the Pear-Cherry Chutney
- 2 cups pears, diced (1 pear)
- 2 cups frozen cherries
- 1/2 cup sugar
- 1/4 cup orange juice
- 1 lemon, juiced and zested
- 1 teaspoon grated fresh ginger
- Pinch salt
For the Chocolate Samosas
- 8 sheets phyllo dough
- 4 tablespoons butter, melted
- 1, 10-ounce bag of bittersweet chocolate
- 2 tablespoons half-and-half (you can substitute 1-2 tablespoons butter)
INSTRUCTIONS
For the Pear-Cherry Chutney
- Add the cherries, sugar and orange juice to a saucepan over medium heat.
- In a small bowl, add the pears and pour the lemon juice over them and add the zest.
- When the cherries open (about 5 minutes), add in the pear mixture and cook for another 5 minutes.
- Add the salt and ginger, reduce the heat and allow the mixture to cook down for about 10 minutes, or until thickened.
For the Chocolate Samosas
- Preheat your oven to 350 degrees F.
- Melt the chocolate, either in a double boiler or slowly in the microwave in 10-second increments, and mix the half-and-half (or butter) into it.
- Lightly flour your work surface. Have a piece of waxed paper and a damp towel ready. As you remove sheets of phyllo, use the waxed paper and towel to cover the remaining phyllo until you’re ready to use it (it dries out very quickly).
- You’ll use a total of 8 sheets of dough (4 sheets per 6 Samosas).
- Place one sheet of dough on your work surface and brush it with the melted butter. Add another sheet of dough on top and brush it with the butter. Repeat this process until all 4 sheets are layered.
- Cut the layered sheets into three vertical rows. Cut each row in half. This will yield 6 Samosas.
- Starting with the first half row of dough, dollop the melted chocolate at the top third of the first row. Fold the dough over into the shape of a triangle, and continue to fold the dough in opposite directions (as you might fold a flag). This should take 3 folds.
- Gently pinch the ends closed and brush the top of the Samosa with the melted butter and place on a baking sheet. Repeat the process for each row of dough.
- Repeat with another 4 sheets of phyllo and place those on a baking sheet.
- Bake the Samosas for 8-10 minutes or until lightly golden.
- Serve warm with the Pear-Cherry Chutney as garnish (and vanilla ice cream if you’d like).


Spencer says
Patricia says
Sarmishta Pantham says
Patricia says
MRN says
Patricia says
Sareta says
Patricia says